|
Micro Lathe MJ-189
This was the first machine I bought and re-freshened my skills on. A good but small machine with great potential but needs to be handled according to size.

MJ-189 is the name of a Chinese clone of the european EMCO Unimat 3 and 4. This clone turned out to be just as good as its European cousins but at a much more attractive price. It uses the same attachments and accessories so they can be readily purchased. The following table gives some further specifications.
| Center height (mm) |
45 |
| Length between centers (mm) |
250 |
| Swing over bed (mm) |
90 |
| Swing over cross slide (mm) |
62 |
| Chuck mount |
M14x1 |
| Taper inside spindle |
No |
| Taper in tail stock |
M14x1 |
| Length (mm) |
280 |
| Depth (mm) |
200 |
| Hieght (mm) |
220 |
| Weight w/o Stand (kg) |
10 |
|
Motor (W) |
100 |
In addition to the basic functions that makes the machine into a lathe some necessary functions, useful functions, and desirable function that will make the machine even more cersatile and useful. The following table lists those groups of functions for the MJ-189.
|
Necessary Functions |
Exist |
| Thread Cutting |
Acc |
| Back gear |
No |
| Lead screw rotation change |
Yes |
| T-slotted cross slide |
Yes |
| MT 2 in Tail Stock |
No |
| tailstock for taper turning |
No |
| Saddle hand wheel |
No |
|
|
|
Useful Functions |
|
| 4-way Tool Post |
Acc |
| Gap-bed |
No |
| Hole through spindle (mm) |
10 |
| Thread dial on lead screw |
No |
| Spindle Lock |
No |
| Autostop on Saddle drive |
No |
| Can use Collets |
Acc |
| Graduated Tail Stock |
No |
|
|
|
Desirable Functions |
|
| Screw Cutting Gear Box |
No |
| Cross Slide Autofeed |
No |
| Clutch for Spindle |
No |
| Cooling Equipment |
Yes |
| Graduated Handles |
Yes |
| Lever Feed Tail Stock |
No |
| Speed Regulator |
Acc |
*Acc = Accessory
This little machine does not have many built-in functions, but instead a wide range of accessories to supply most of them and a few more. Today it seems like it is not possible to find a new MJ-189 but SIEG makes a machine called C0 and is of the same size. The only main difference is that the C0 has a 150 W motor and electronic speed control.
The Accessories
It is the accessories that provides this little machine with its versatility and flexibitlity, and there is a requirement to get at least a few to begin with. Then there is no upper limit.
Basic Equipment
The first items I got was the following:
- Lathe Cutting Tools - I use both 6 and 8 mm tools of both HSS and TCT type.
- 4-jaw Chuck provides better possibilities to set up irregular work.
- Live Center gives good support and does not have to be lubricated during work.
- Top Slide for taper turning. This attachment turned out to be very good as taper turning was more common than I first thought.
More Accessories
As time passed the number of attachments increased to be able to handle more varied jobs. they were bought when prices were right.
- Surface Plate 1 with three slots for screws instead of using an ordinary chuck, Used to set up very irregular details for machining, or when the whole of the surface is to be turned so that only screws can hold teh work.
- Surface Plate 2 with T-slots for better work holding instead of ordinary chucks.
- Surface Plate 3 with a flat plain surface for mounting work using double stick tape for example.
- Live Center with Changeable Tips were made to increase work support and to make wood turning of handles possible.
- Lead Screw Auto Feed Simplifies to get a nice surface as autofeed gives a more even feed. An accessory that is fitted on the side of the machine together with asmall drive belt. By turning one end of the belt, left hand feed can be arranged.
Below are a few overview pictures of the various accessories I have purchased over time.
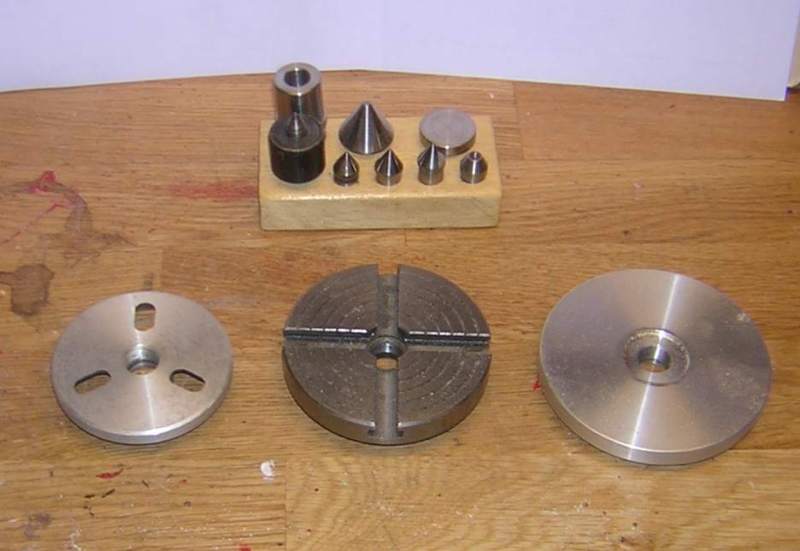
Centers and Surface Plates
In the upper row we see the collection of centers, both live and fixed. The front row shows the three surface plates.
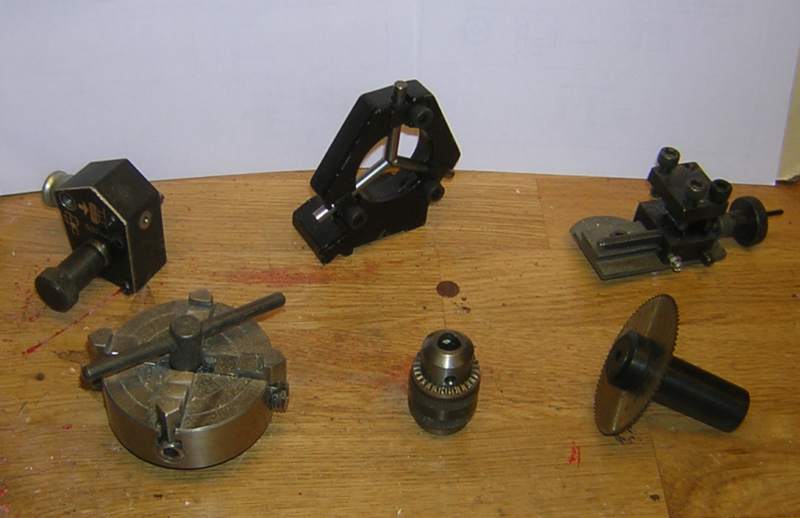
Chucks and others.
I rear row we see the lead screw drive unit, the fixed steady and the top slide for taper turning. The fixed steady is used for supporting a long piece far from the chuck where it is necessary to work on its end without tail stock support.
the front row shows the 4-jaw, drill chuck and slitting saw with mandrel.
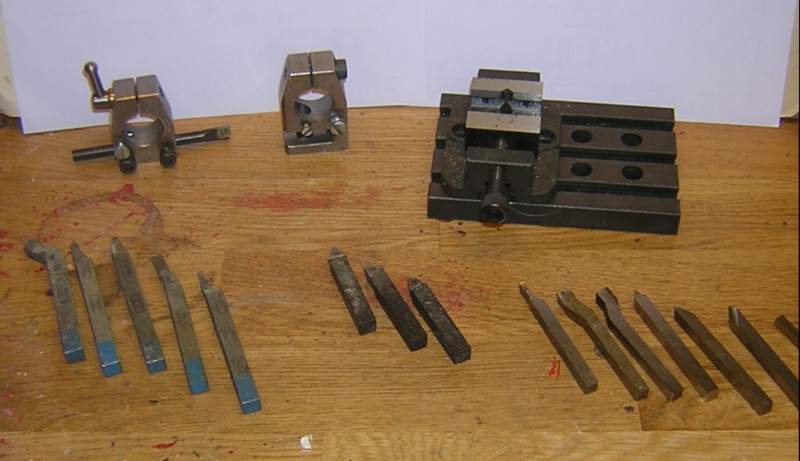
Cutting Tools and Holders.
The rear row shows two of my home made Norman Patent tool holders. the left one with a boring tool and the right one for a single straight knurl. To the right there is the milling table and the machine vice.
The front row shows some different turning toools, From left to right; Soldered TCT, Then exchangeable tip TCT, and finally HSS. All good for different purposes.
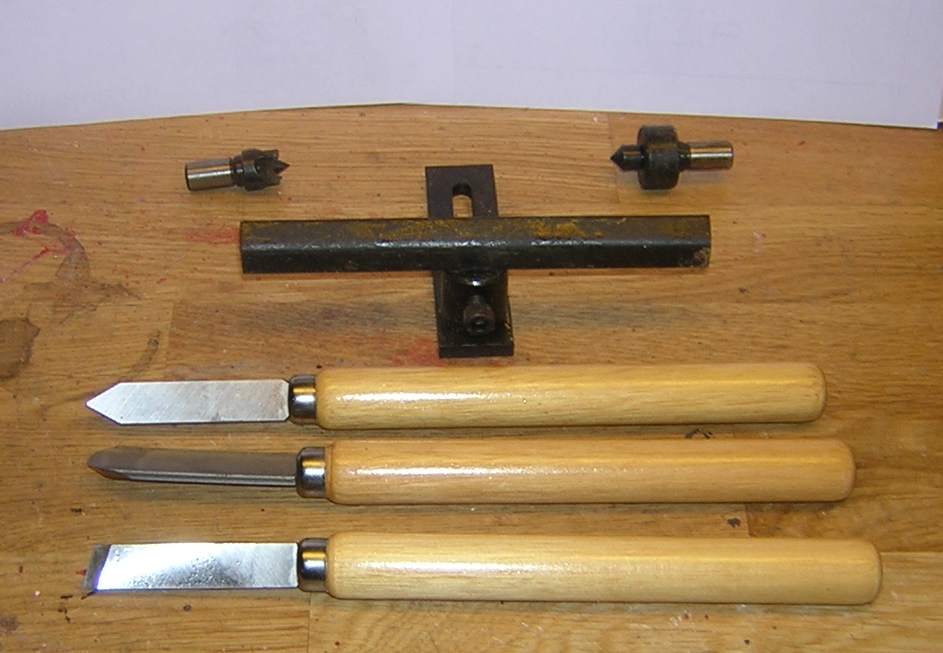
Wood Turning
Finally, to be able to turn small wooden items in a good way I have gotten some centers, a support and three hand held turning tools. The difference between metal and wood turning is big enough to require completely different tools.
Modifications
To make my machine even more versatile I have made a few small modifications as described below.
Surface Plate for Thin Jobs
This is a completly flat surface plate used with double stick tape for careful machining of thin jobs. Made from a piece of 10 mm aluminium plate to fit directly onto the spindle.
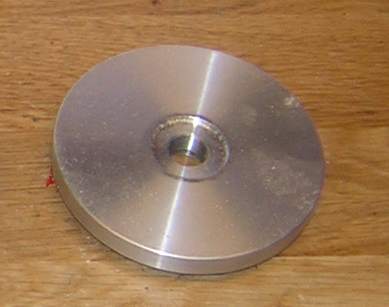
Very useful both with tape and tail stock support.
Building Instruction here.
Swarf Tray
As time passed I got tired of all swarf that spilled around the lathe and down on the table. It became a task to keep the work space clean. The solution was to make a swarf tray to catch and keep the swarf in place.
The swarf tray is the red "plate" on top of the red stand. After adding this it became much easier to keep things in good order and less cutting fluid all over the place.
Building Instruction here.
Quick Change Tool Post, Norman Patent Type
I got fed up with keeping track of shims to get the cutting tools at heght and the original tool holder felt wobbly in some cases. Time for a solution. The best was to make a completely new tool holder for easier tools change between tools on the same mount. I choose a type called Norman Patent where a round post is used onto which individual holders with separate height adjustment are clamped.
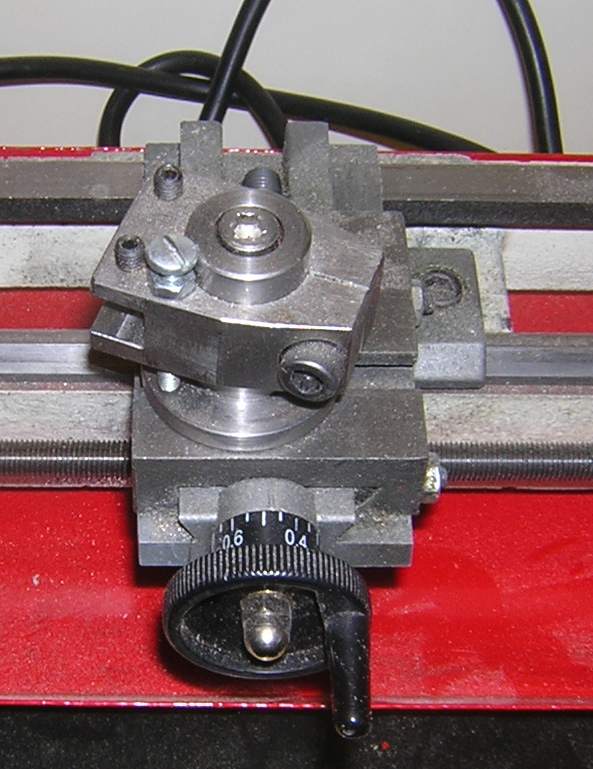
The solution turned out to be very good! Stability clearly increased and with the built-in height adjustment it was easy to keep all tools at the correct center héight. I made holders for the following types of tools:
- 5 x Ordinary straight cutting tools
- 2x boring tools (one for 6 mm and one for 10 mm)
- 2x Knurling tools
All holders have height adjustments so it is only a matter of setting the height with a screw and lock it when correct. To change a tool, unlock a holder from the post and slip on another and lock it - done.
Building Instruction here.
Live Centers
In some cases it is very useful to have live centers of other shapes and sizes than the original. They are not difficult to make, not even live ones. After finding a tip in a book I made the one below.
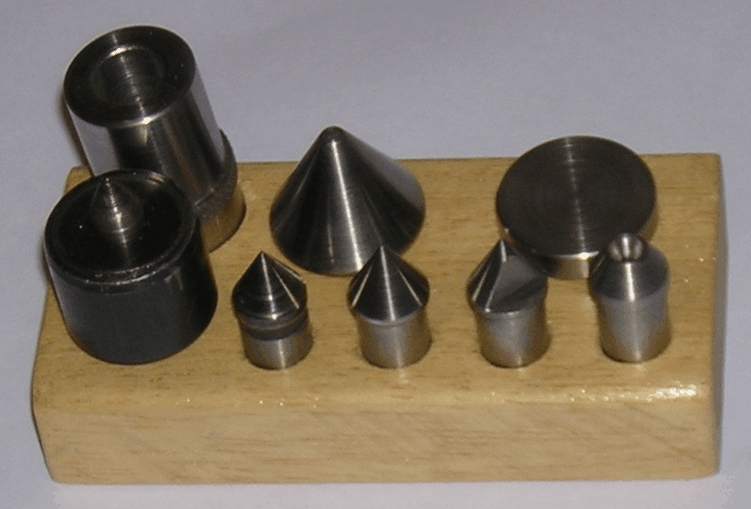
I also added room for the original fixed and live centers. I made the following types:
- Fixed half center to get really close with the cutting tool.
- Pipe Center for larger holes or pipes.
- Push plate to use either as push plate or as flat center
- Reversed center with a center hole to support thin or conical work pieces.
- holder with ball bearing to make the tips live.
All is made in steel and are very useful accessories.
|