|
Project - Switchboard
On SDJ there is a hidden train yard (fiddle yard) for the normal gauge trains that makes up the background traffic. The idea is to create an illusion of a normal gauge double track main line. When these trains are waiting in a yard not possible to see it is important with feedback to avoid anything happening.
Below I will describe how I made the graphical switchboard for the hidden train yard and what I want it to show. This is one of two panels for electrical things and they are both placed at the center of the layout for ease of use. The other panel is for the street lights etc all across the layout. This description will only describe the graphic switchboard.
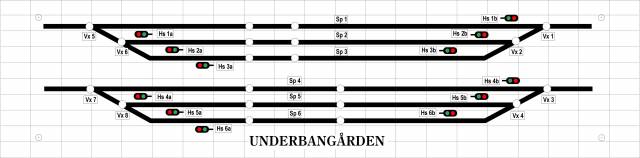
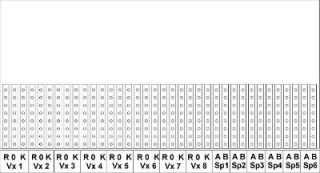
The yard has six tracks, three for each of the lines, and all are shown on the graphical panel. I have prepared for functions tha can be managed with both digital and analogue control.
- A self-return lever switch (on)-off-(on) at each switch
- A switch that breaks the voltage for each track
- A push-button for each track to set right of way with a single push.
- Red/Green signal that shows if the track is free or occupied
- Yellow LEDs shown right of way.
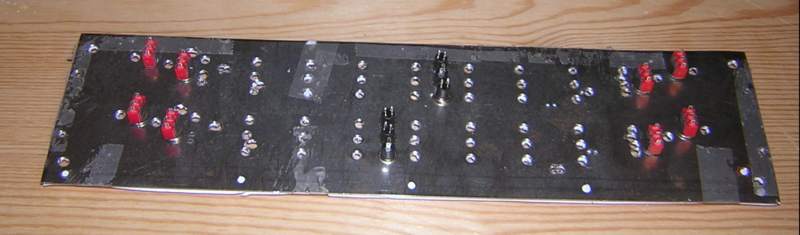
The image for the panel was made in a computer to be glued onto a steel sheet. The first image was just taped to the sheet and used for marking out and pre-drilling all holes, in all 65 holes. I used a short slocombe drill to do this.
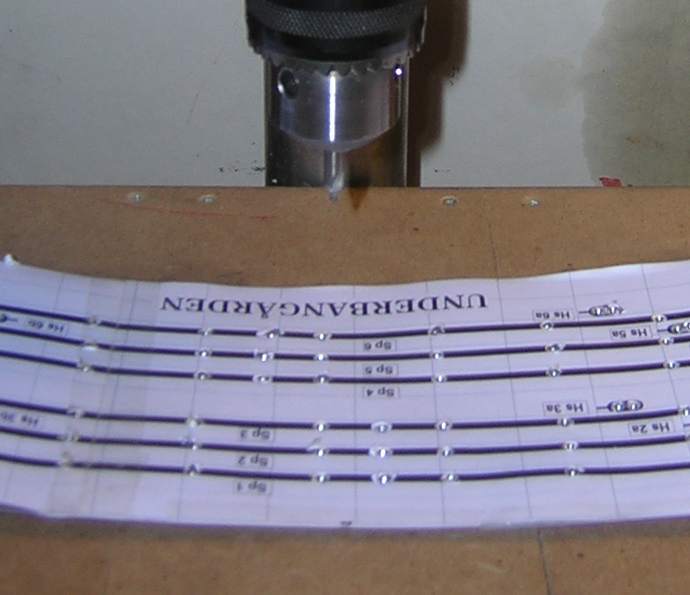
As can be seen, the sheet bends for every hole drilled but it is easy to straighten afterwards. When all holes are marked and pre-drilled, they are finished to size with ordinary jobbers drills. I choose 3 mm LEDs so all LED holes are 3 mm. The holes for the switches and buttons were 6 and 7 mm respectively.
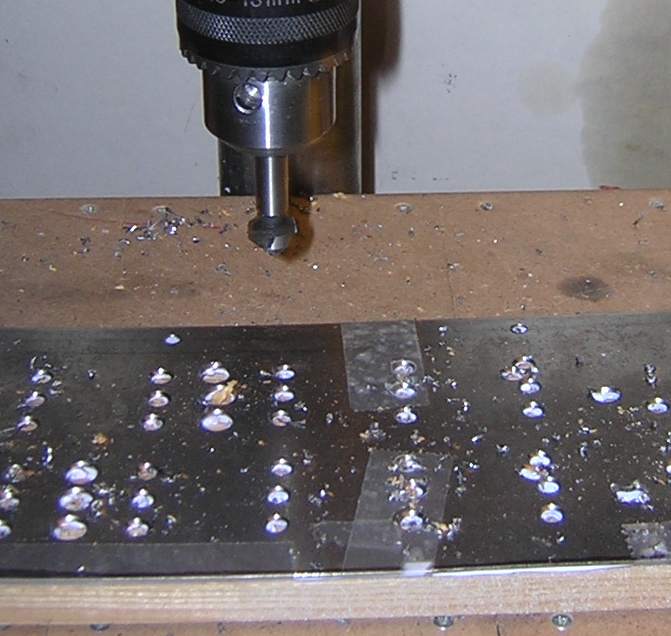
When all holes were done, I turned the sheet over and cleaned of the rugged edges using a counter sink bit. Then all components were trial fitted so taht any adjustments could be made before anything was finally fitted.
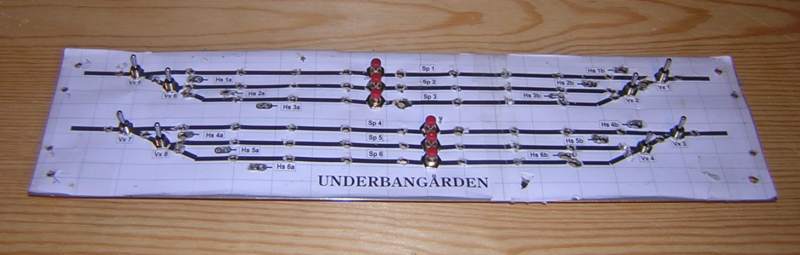
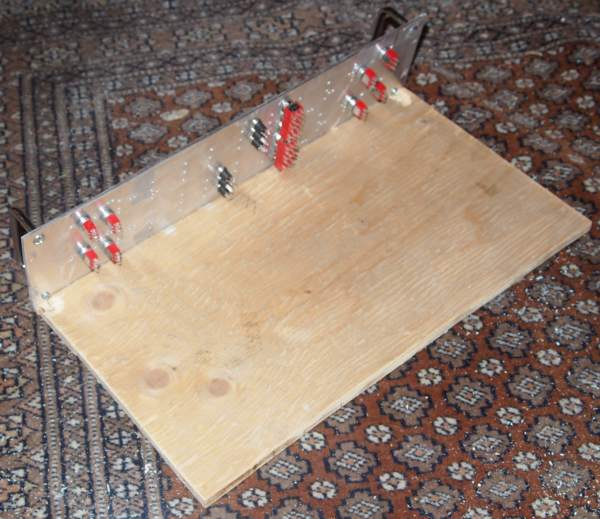
Some of the switches and push-buttons lightly screwed in place. Looks good so far I think. It will be fairly easy to solder cables and resistors onto the switches, buttons, and LEDs.
The same panel from rear side. I have chosen 1-pole switches and buttons as I only need a signal pulse from each, but the track switches have 2 poles to both break the power and to show closeed or live track.
Work continues to straighten the steel sheet and adjust the hole pattern. Then the image is printed once more and glued to the front using spray photo glue. All the holes are caregfully opened when the image is well stuck to the sheet. The test assemblu below shows that all electro-mechanical parts are in place, as are the handles to insert/remove the panel in its place.
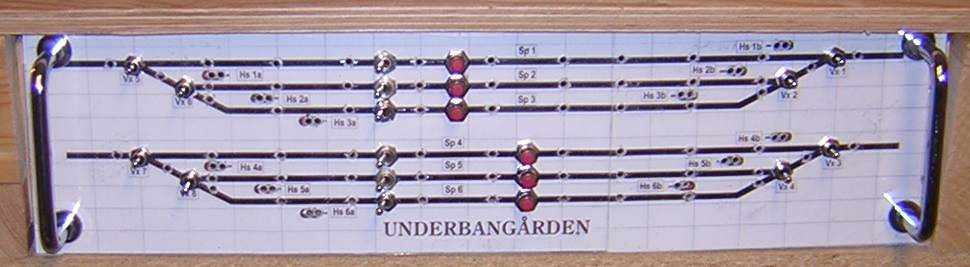
Looks good, but the image is unprotected and therefore sensitive to dirt. I got a thin polystyrene sheet (from a cheap IKEA picture frame) which is cheaper than buying Evergreen sheets! I cut a suitable piece and carefull drilled all the holes once again, this time finally.
The panel itself is mounted onto a piece of plywood. The panel image covers the screw heads. This make it easier to connect cables and connectors and will also make the whole unit easy to remove for service.
Now it is time to assemble the whole thing and connect cables to suitable rows of connectors for power and to track. Making small labels on the computer simplifies a lot. I use the common MR colour system.
The whole panel is fed from a small wall wart transformer as separate power source. The panel does not use very much regardless if it is for analogue or digital control. It really is not very complicated and the electrical bit is already described in the file for Switch feedback.
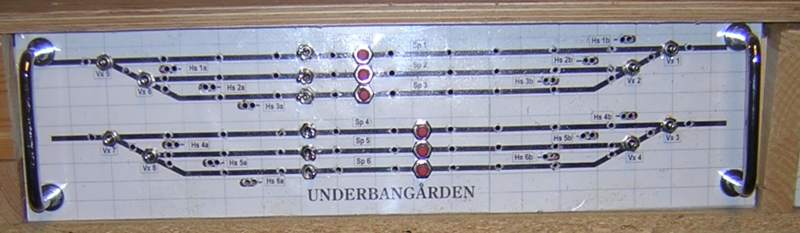
It looks like below when finished and in running order.
[Illustration pending]
Good Luck!
/Peter
|