|
Build Log - Practice Field Schoolhouse
In the right innermost corner of my layout we find the military practice field with its schoolhouse. The house is built using Plattenbau-technology which means a build using pre-cast concrete blocks just like in the build boom areas all over the place.
Starting Point
The Practice Field Schoolhouse is a concrete block building something that suits to build using plasticard and ordinary plastic cement. The house willb eplaced right in the corner as a facade building with just a little background round the edges. Then there willb e more detailing beding it in. So, starting with the background.
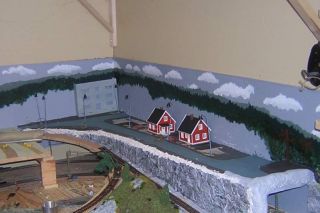
The above picture is taken at a point where I needed to test the look to be. The main tree-line on the horizon is painted, the ground is prepared, and the placing of street lights is ongoing. Finding the right places for the different houses is also important. In the inner corner it is possible to see the schoolhouse as a grey concrete block with square holes. Now let us concentrate on the schoolhouse build.
Plattenbau builds
If the setting is mid to late 1960s and onwards a hpouse of this type fits in very well. The demolotion rage has begun and new housing is to be erected at speed. To be able to do this it became common to use pre-constructed concrete blocks, "Plattenbau" blocks. The ideas came from different places in the beginning, both Britain and the Netherlands appears in various figures, but it was in Germany (both West and East) that the technique was used to restore after WW2.
The technique using standardized concrete blocks resulted in very fast building of Rresidential houses, Malls, Schools, Barracks, well just about anything could be built in a short time. The draw-back was the grey concrete colour, but the builders tried to soften that by varying the colors in the concrete and add decorative shapes.
According to Wikipedia the system was based on a grid with the basic module 100 mm and the base grid of 12 modules (= 1.2 m). The distance betrween the system lines (=n x 1.2 m) on a base grid of 6.0 x 6.0 m. With this as base it was very easy to sketch new buildings directly on an average note pad where each square in the grid could be equal to a base module.
Plattenbau is therefore quite handy to model as it only use straight and square shapes and simple blocks. It can be done using just about anything and is perfect for cardboard builds! If styrene sheets are favored, PIKO have a number of kits made with the WBS-70 standard as base, see:
http://www.piko.de/produkt_db/check.php?page=shop&grand_id=5&parent_id=1&child_id=8
There are four different variants, or like at eeDesignez below who have the individual blocks as laser-cut parts to combine as you like. With or without balconies and other small parts.
http://ee-designz.de
More information concerning Plattenbau buildings is found in Wikipedia. Search for Plattenbau.
A simple drawing of the schoolhouse build will be helpful, so the below is base for it all.
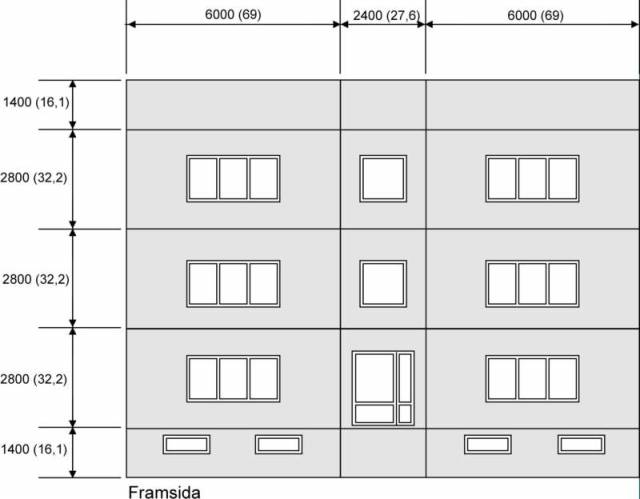
Bild 2: Basic measurements.
Enough talking about the background, time to start building.
From Words to Action
With the drawing printed to size and taped to a sheet of 1 mm styrene is drilled small holes in all the corners of the openings to be, and then a larger hole using a hand held hole punch. Then the openings were cut out along the lines and the "concrete blocks" marked with heavily scraped lines across the surface.
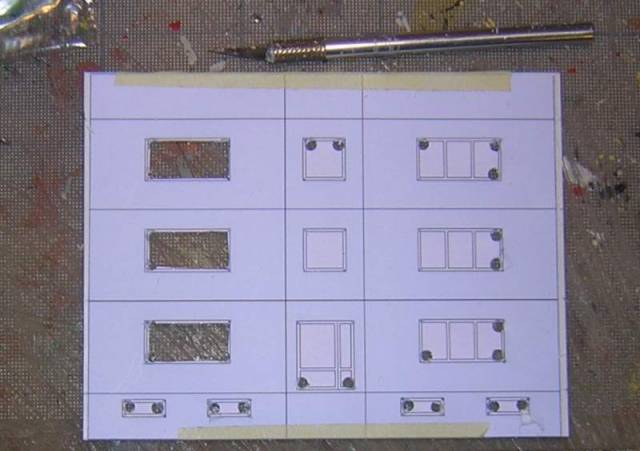
Bild 3: Front facade in the working.
When all openings were cut, they were filed smooth and straight, and the scraped lines were once again scraped through to be slioghtly over-done and clearly visible. A layer of matte color covered most of the undesired scratches.
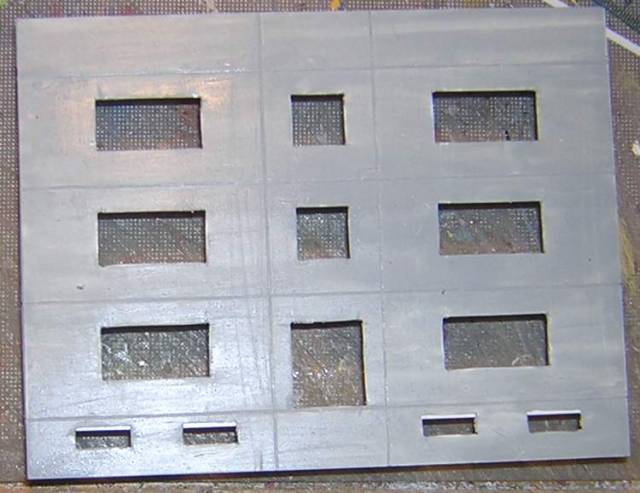
Bild 4: Front facade ready.
So far so good, we need a bit more to reflect the "depth" of the surface and make the whole thing less "flat". Therefore I added about half of a module in width of the side walls who also got the facade scraped block partinglines. Then to stabilize the walls I made the separate levels using the same 1 mm styrene sheets as used for the front. Not beautiful but practical.
It is not only a facade we need, there is a little more to make the illusion of a larger building correct. The easiest way is to create the differnt levels also on the inside. This will support and re-inforce the build and make possible some nice interior detailing.
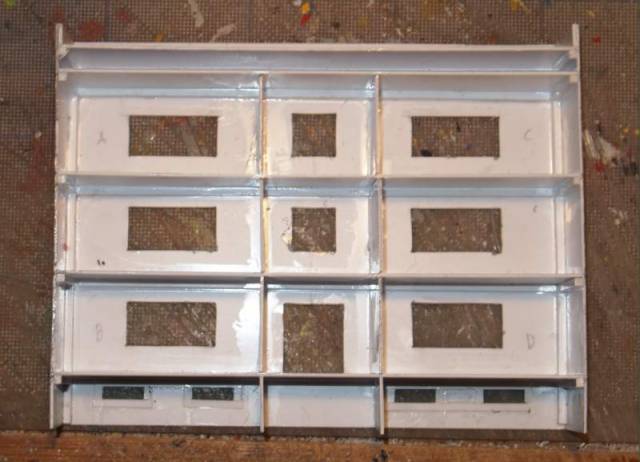
Bild 5: The inside of the Schoolhouse.
Next steps will be to mount the window frames on the inside for all windows and the door anbd then paint it using a suitable base colour. As can be seen at the top of the photo, this type of building have a flat roof, a fact atht in this case is used to place some communication equipment and antennas of various types.
When all windows and some more is done it will look even more like a house. The stairs up to the first floor was perhaps not that common in Sweden but here at the practice field it saved the digging for the base of the house. It was supposed to be a budget build.
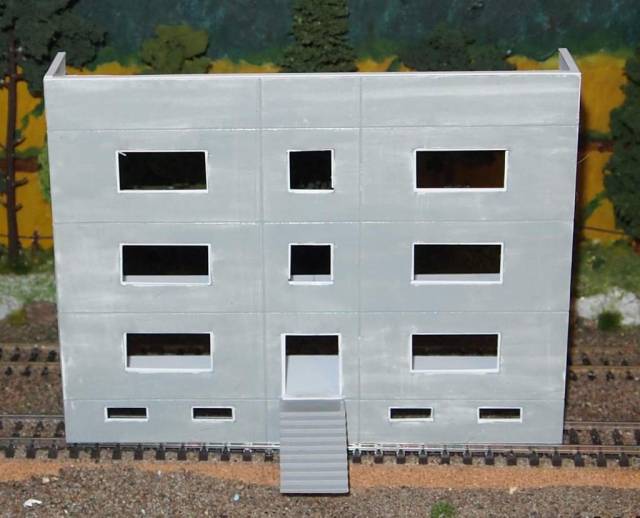
Bild 6: The basic house nearly done.
The work continues by making the windows and add what is missing on the roof. Then time for a first colour test an the facade. I aim for a dull gray/sand color to make it look right. Below is the first try using a sand colour.
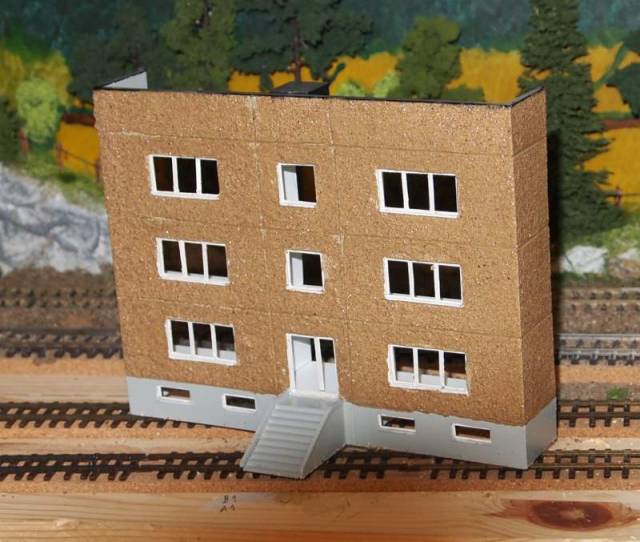
Bild 7: Windows done, The roof nearly done and first colour test.
The sand color was too glittering and had a kind of plastic surface that did not appeal to me. Something else is required. I tried to paint a rather thick layer of paint and then drizzle some really fine grained real sand from NOCH into the paint. This makes the facade really coated with sand like in reality. Where does this take us?
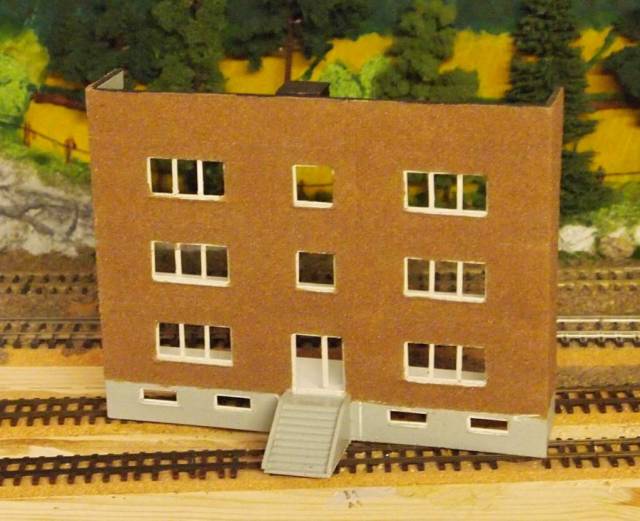
Bild 8: Sand instead of paint as in reality.
The sand made it very good! The only draw-back is that the sand is the wrong colour so I have to paint also on top of the sand. This will be good to be sure the sand sticks and I will not have to clean out sand all over the place.

Bild 9: Freshly painted facade.
That´s better! Even better in reality than on pictures, very nice! At this stage the entrance roof is in place and it all starts to look really useful. Next step is to add detail to the outside as far as can be done and then start with the inside.
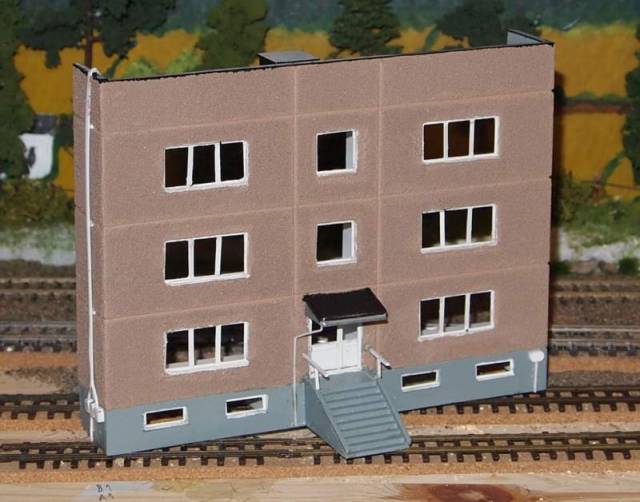
Bild 10: Now with more detail.
Stair railings and water pipes from the entrance roof, cables and connection boxes in one corner of the front wall. Half of the details ar for electricity, the rest for practice of other telecom equipment. Here is enough capacity of telecom equipment to last a mobile higher command.
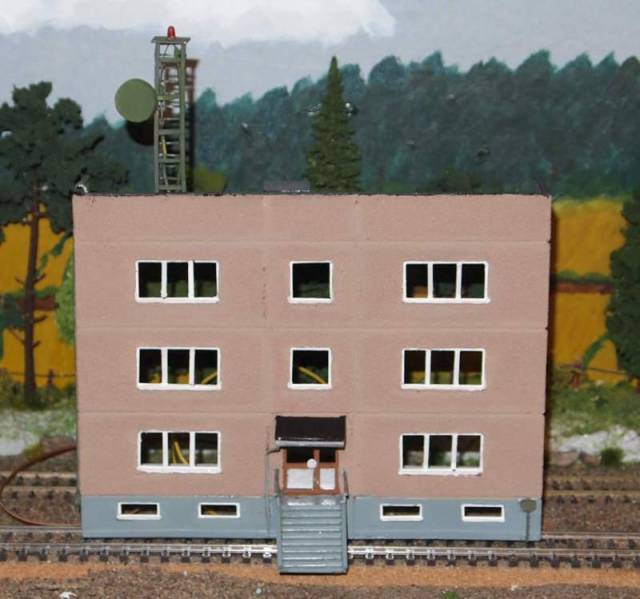
Bild 11: Outside ready with main detailing.
Details are now painted. The entrance door that actually was made of wood has got its colour, as have handles, connection boxes. Military equipment is normally flat green like the short antenna tower on top of the roof. On its top we see a red lamp to warn helicopter pilots for the real height of the building. The first larger antenna is also in place.
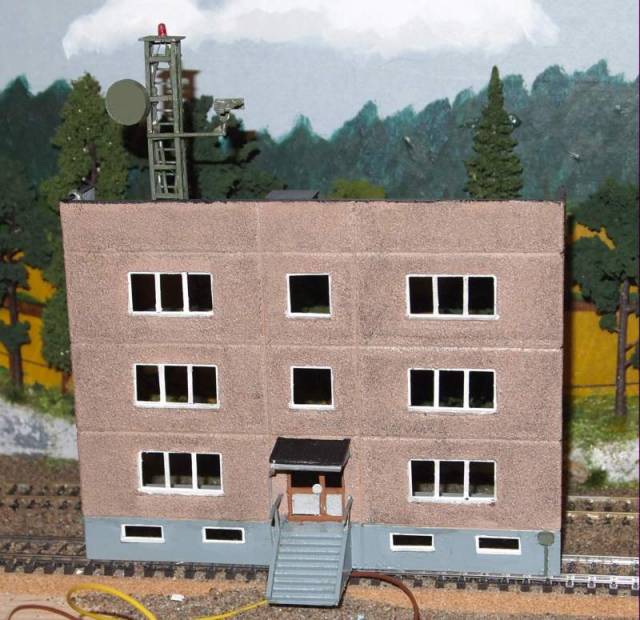
Bild 12: The Facade after weathering with more antennas.
These Plattenbau houses became dirty quite fast. Everything stuck to the relatively coarse surface and precisely that was what I was tryimng to achieve. A black-ish dusty surface was created by lightly rubbing a pencil across the surface. I noticed that the graphite only stuck to the tops of the sand so I rubbed it out using my finger tip(s) and now the result was quite OK.
To fixate the graphite I wanted to add a layer of flat clear laquer and brought out my Hunmbrol tin. It seemed like the graphite gave more colour when wet by the laquer but was quickly sucked into the coarse paint/sand surface. It turned out quite good in the end compared with how houses looked in reality. They ARE dirty in a patchy way all depending on how deep the sirt was sucked into the surface. I feel quite satisfied with this.
Time for some inside jobs, which means painting and detailing of the interior.
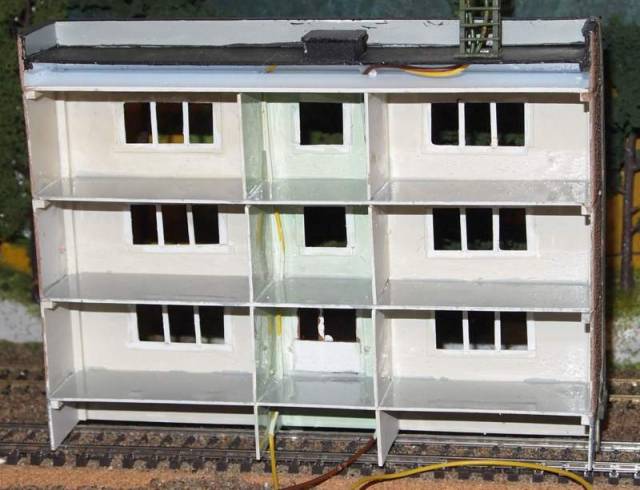
Bild 13: Turning the house over .... and continuing on the inside.
Before putting the glazing in place, the walls, roofs and floors on the insed needs some paint. The picture shows that the roofs and walls of the school rooms now have a suitably boring beige colour and the florr have the traditionally motled grey colour. The latter colour also find its way onto the floors in the stairways, the roofs have the same boring beige colour, but the walls have a daring pale greenish-blue colour.
Will add one more layer before windowsill and curtain bars are added and the glazing being installed. Perhaps hard to see as all parts are still white.
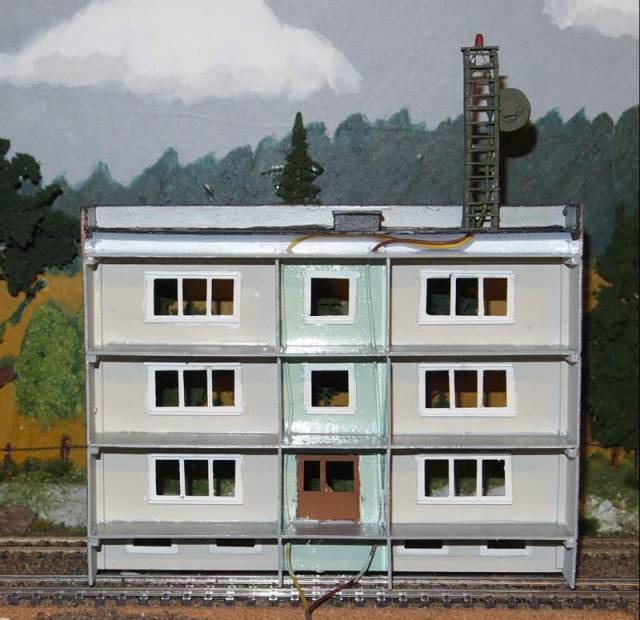
Bild 14: Inside painted and detailing started.
The colours on the inside are still a bit too glossy and have to get a layer of flat varnish to be more correct. Only windows to put in now. Before doing that I placed the house on its back onto a sheet of styrene to trace the inside of the walls.
Using a sift pencil I traced all inside walls before the house was removed. Then I filled in the lines and thereby got borders for the back walls of the rooms. This was used to become the base for the details of the different class rooms and when fitted to the back of the house, i hope very little light can pass from one room to another.
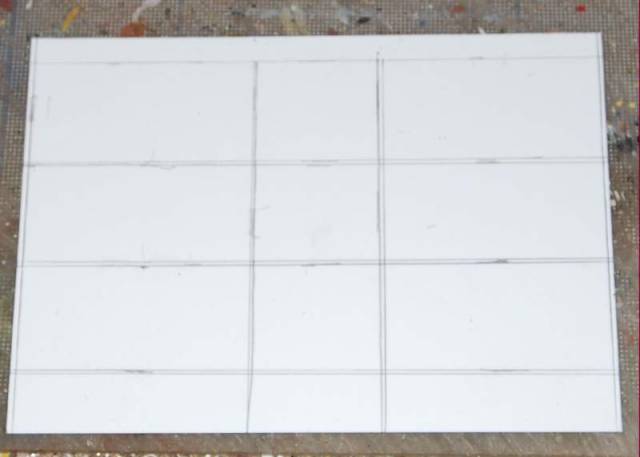
Bild 15: The rear wall with its traced lines.
Next is to glue a small layer onto every "room area" and to decorate anddetail as I want. When ready the rear wall will be screwed to the house making later service much easier.
This is a far as I have come right now.
Work Continues ...
Since this is a build log, the content will be updated as work proceeds.
I will be back!
/Peter
|