|
Mini Lathe SIEG C3
This is my machine number two and the one I have increased my turning knowledge on. A good machine with great possibilties but who needs to be handled according to its size.

C3 is the name of this Chinese machine from SIEG. It has turned out to be just as good as its European cousins but at a better price. Since it is large than the MJ-189 I had to get a newset of accessories and atachments, while some can be used on both machines. The following table gives the specifications of the C3.
| Center height (mm) |
90 |
| Center Distance (mm) |
350 |
| Swing over Bed (mm) |
180 |
| Swing over Cross Slide(mm) |
? |
| Chuck Mount |
Flange |
| Head Stock Taper |
MT 3 |
| Tail Stock Taper |
MT 2 |
| Length (mm) |
500 |
| Depth (mm) |
220 |
| Height (mm) |
240 |
| Weight w/o stand (kg) |
45 |
|
Motor (W) |
350 |
The folloing table lists the functions in groups of mandatory, desired and extra. The more available, the more flexible and versatile the machine will be.
|
Mandatory Functions |
Exist |
| Thread Cutting |
Yes |
| Back Gear |
"Yes" |
| Rotation Change on Lead Screw |
Yes |
| T-Slotted Cross Slide |
No |
| MT 2 in Tail Stock |
Yes |
| Taper Turning Tail Stock |
Yes |
| Geared Saddle Hand Wheel |
Yes |
|
|
|
Desirable Functions |
|
| 4-way Tool Turret |
Yes |
| Gap bed |
No |
| Hole through Spindle (mm) |
20 |
| Thread Clock on Lead Screw |
Yes |
| Spindle Lock |
No |
| Autostop on Lead Screw Drive |
No |
| Use Collets |
Acc |
| Graduated Tail Stock |
Yes |
|
|
|
Extra Useful Functions |
|
| Screw Cutting Gear Box |
No |
| Cross Slide Autofeed |
No |
| Clutch on Spindle |
Yes |
| Cooling Equipment |
Acc |
| Graduated Handle on Lead Screw |
No |
| Lever Operated Tail Stock |
No |
| Electronic Speed Control |
Yes |
*Acc = Accessory
The C3 does have more built-in functions and also a wide range of accessories for even more functionality. Today there is also a version called Super C3 with a 500 W motor and a longer bed.
The Accessories
Even if the accessories to the C3 are not that many compared with the MJ-189, they are quite enough as they are. Just as for the small machine there is a need for a minimum must to get started, but then threr really is no upper limit.
Basic Equipment
Some tools are thus necessary to be able to start turning. I got these ones:
- Turning Tools 6 and 8 mm square shanks. Both HSS and carbide, the latter ones both soldered and with exchangeable tips.
- 4-jaw Chuck 100 mm gives better possibilities to set up irregularly shaped work.
- Live Center gives good support during turning and does not require lubrication during work.
- Drill Chuck with MT 2 taper shank for all kinds of drilling and taping work. I also got myself an adaptation sleeve from MT 2 to MT # to be able to use the chuck in the spindle as well.
More Accessories
As time went the number of accessories increased to be able to handle more varied jobs and they were acquired when prices were favorable.
- Surface Plate with slots for mounting screws to set up jobs instead of using a chuck. Very useful for offset centers and larger holes that cannot be drilled.
- Travelling Steady To provide support for thin jobs during turning. This type of support is fitted on the saddle and travels with the turning tool along the work. This avoids long or slender jobs to bend away from the turning tool.
Below you will see some of the accessories I have got myself over time.
Modifications
To provide some more advantages to my C3, I have made some modifications as described below.
Thumb Screws for the Change Gear Cover
This cover is normally fixed using two long socket head screws that must be unscrewed to get access to the change gears. Impractical and time consuming. They are replaced by two thumb screws which makes removing much easier and simpler. This was my first project for the C3.
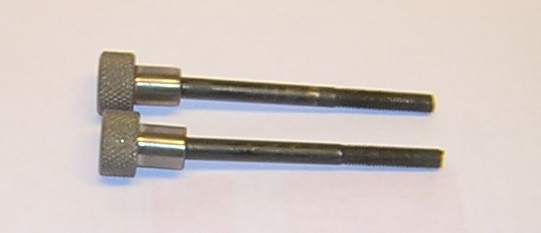
The result was beyond expectations. The screws look like they are the original ones and do their jobs perfectly. Should have been standard equipment. Building Instruction here.
Tool Tray on top of the Head Stock
By old habit I put the chuck key on top of the head stock. Works fairly well, but sometimes vibrations makes the key fall off. A shallow tray will solve this in a good way. It is made as big as possible without fouling anything.
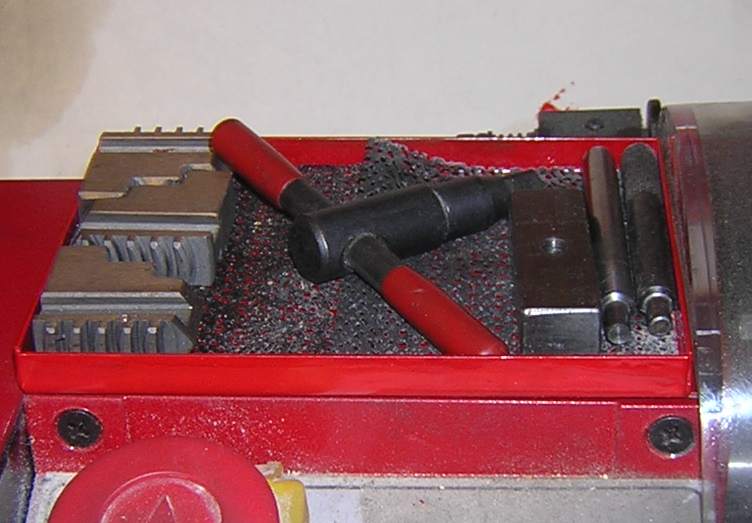
In place it is big enough to handle the chuck key as well as the three outside jaws for the 3-jaw and some tommy bars. The bottom of the tray is lined with a piece of drawer anti-slip matting which also provides some extra sound proofing. The tray is fixed to the head stock using some double-stick cushions.
Building Instruction here.
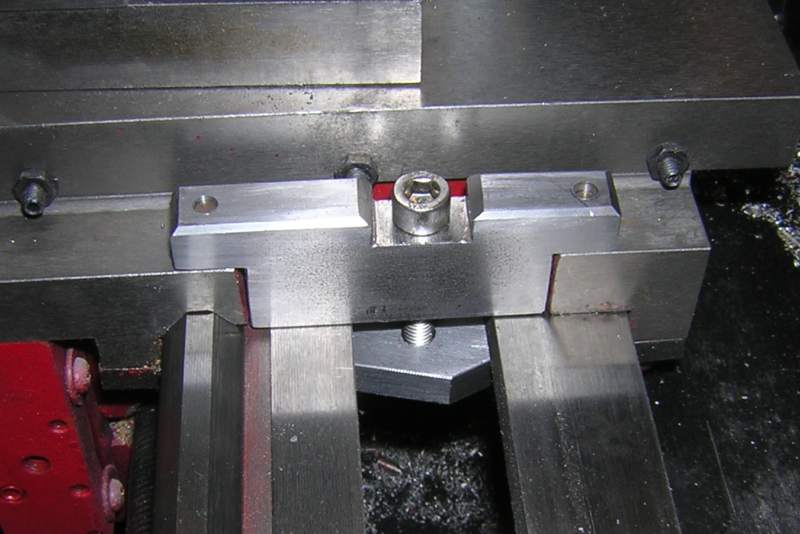
Saddle Stop
A simple and very useful little accessory. Is simply clamped on the bed and can easily be set so that one gets a stop at the proper position. Especially important when working on the inside of large or blind holes.
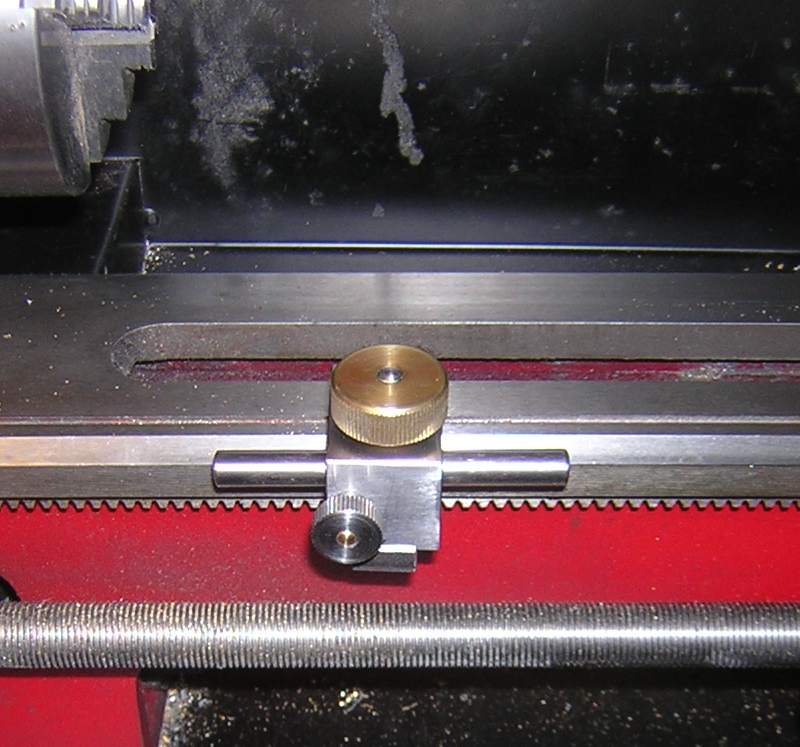
To get a micrometer adjustment facility I made a stop screw that fits against the bar of the saddle stop. The stop screw can be set at 0.025 mm graduations.
The stop screw is fixed to the saddle but the stop itself is fitted in no time. A very nice little project.
Saddle Lock
A saddler lock locks the saddle to the bed. This is necessary when parting off and other jobs where high precision is required, like threading or cone turning using the top slide. The lock is fitted to the right side of the saddle.
This is also a simple little project but ever so useful. It simplifies some tricky job sequencies while at the same time increases safety and precision.
Headstock Dividing Attachment
At more than one occasion I have had a need for making a scale ring or something to divide a circle into a number of equal parts. The easiest way to solve this is to fit a gear at the rear of the spindle and using a stop to lock the spindle to scribe the line or mark a position. My solution looks like below.
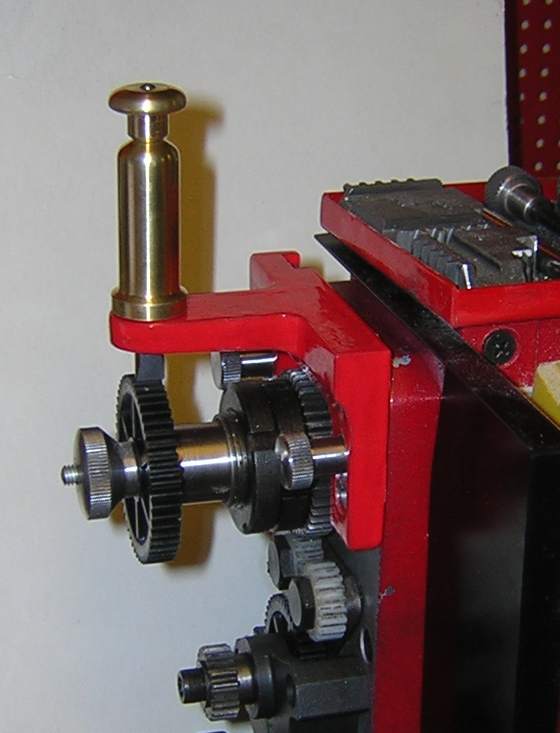
The solution turned out to be quite good! Using either a 50. 60, or 80 tooth gear it is easy to divide a circle into as many divisions as is required. The thumb Screws are made from BMS and the bracket from a piece of angle bar. The stop is made from brass and steel.
Fixed Steady
The original C3 fixed steady has too little capacity I think, only about 30 mm diameter pieces. For that reason I purchased a cast iron kit from College Engineering Supplies - CES - for a Myford-like steady. This has close to double the capacity. What needed to be modified was to adjust the foot to fit the C3 bed instead of the Myford.
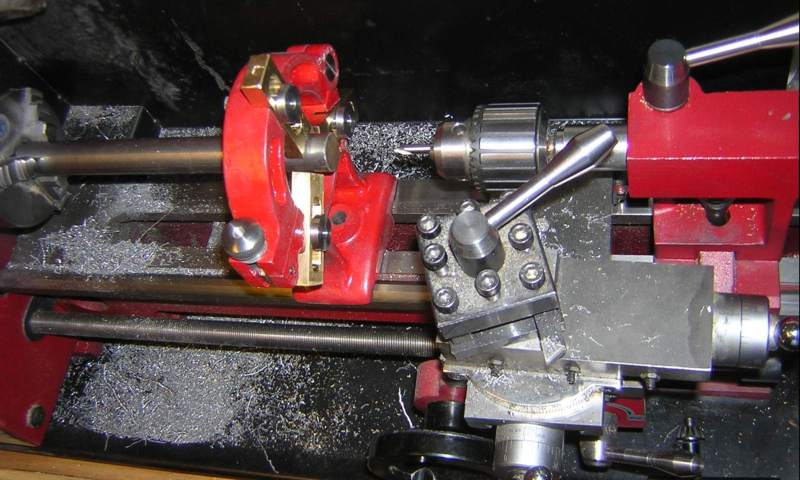
The result turned out very nice and now I have a fixed steady with good capacity and function.
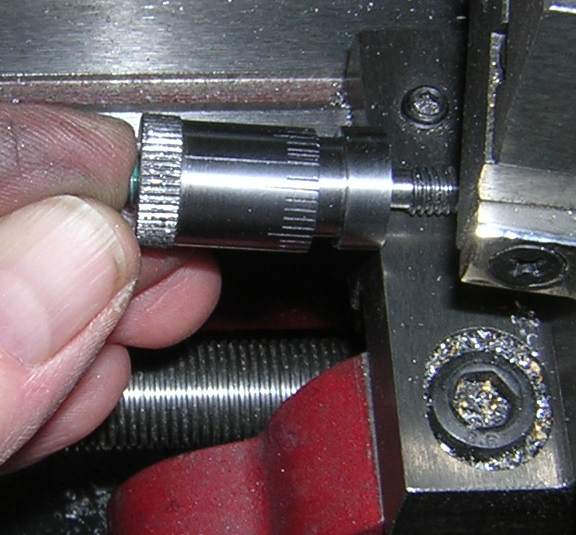
Quick Change Tool Post - QCTP
Also on the C3 I wanted a QCTP. It makes the use of the machine so much better and easier, and this time I choose a variant with a dovetail. The design idea came from the Ishimura web site. The tool holders are positioned using the dovetail and locked by a plunger.
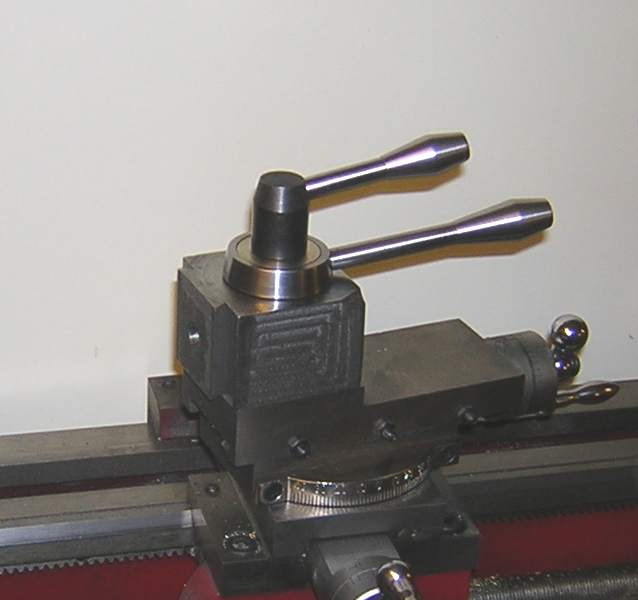
In addition to the body, there is a large number of different holders to make. Everything from ordinary straight holder for 8 and 10 mmturning tools, to boring tools, threading tools, parting tools, ball turning tools, etc. All these tool holders will be shown as they are made.
More accessories will be added as they appear.
|