|
Home
Introduction
News
Dåseberga Gardens
A Garden Tour
Monthly Activities
Garden Projects
Dåseberga Model Rail Road
Dåseberga Mech. Workshop
|
Project - A Japanese Inspired Small Bridge
The entrance to our "forest path" goes over many roots from large firs and larger rocks . I wanted to make this entrance better walk-wise and at the same time protect the roots from un-necessary wear. A common planking would probably be just fine, but as we like the style of the arched asian bridges we tried to use that here as well.
How are the two arched beams constructed? It is by glueing and screwing them togeteher from layers of 25x45 (1"x2") wood strips in four layers to get a 45x100 (2"x4") arched beam that both keeps its shape and can carry a large load. I measured the required length and then where I would need supports to form the arch during assembly.
The material is common wood strips normally used as support for roof shingles and such and were cut in over-length to begin with. The work started with spreading a layer of outdoor wood glue on one strip before placing it in the supports/formers. The next strip followed and was nipped in place using a clamp before screwed to the first strip starting in the middle of the strip.
Then I placed a strap around the strip and towed in at the end supports/formers. Then the strap was tensioned to tow the ends inwards to meet the proper shape and arrive at the formers where I could secure the strip with some screws. I used ordinary outdoor wood screws 45 mm (2") long some 20 to 25 cm (8" to 10") apart along the complete length. Be very careful with the first two layers so that the shape is right and even, and that the whole thing is assembled correctly. The glue is of course a water proof one for outdoor use.
When the first two layers are done, it is time to spread glue on the next layer and put it into the jig as the earlier layer. Secure with a screw in the centre and then tow it in towards the formers and secure with more screws. Now the beam is left to cure for a couple of hours (according to the info on the glue bottle).
When the beam has set, the forth and final layer is added in the same way as the earlíer ones and the beam left to cure again. After curing (which in my case was the following day), the whole procedure is repeated for the next beam. The new one is also checked against the first to achieve the same shape as the first. Beam number two will then be left to cure until next day like the first.
When both beans are made it is time for some sanding and finishing to remove coarseness and glue overflow. The beans does not need to be totally smooth, but there should not be any major roughness. Paint adheres better to a less smooth surface.
After finishing the beans are cut to final length and to be identical. Then painted with a good base paint that dries well before the final surface color is applied. When dry the surface gets the final color , which in our case is a darker red color common in Sweden. This choice of color makes the new bridge match the surroundings and the house perfectly.
When the final color is dry, it is time for the walk surface. I made it from heat-treated outdoor wood that had a light-brown color. The planks were sawed into 60 cm (2') lengths, and into as many pieces was required to cover the length of the bridge. In addition I added two pieces that was fitted like ends of the beams to maintain the distance while the walkway was made.
The assembly started with measuring the correct distance from the walkways end to the beam ends. It was found that a distance of xx cm was the best choice and it gave xx cm between the insed of the beams. A piece of plank was fitted at the end of the beams with this particular distance and the first piece of plank was screwed to the center of the bridge. The squareness of the bridge was thoroughly checked before securing this fiorst plank to the beams using four screws. I choose to build the walkway from the middle of the bridge towards the ends, all to be sure that it looked right and alike in both ends.
It is here in the beginning it is important to check and keep track of angles and distances to make sure that the bridge will be straight and square. Let it take its time and measure often. When this first step is done the rest is a doodle.
The finishing work is to sand the boards of the walkway and give it a first treatment with wood oil. A couple of thin bits of wood or a small piece of asphalt paper is fitted at the underside of the corners where the bridge will rest on a couple of stady stones. A large stepping stone at both ends finishes the installation.
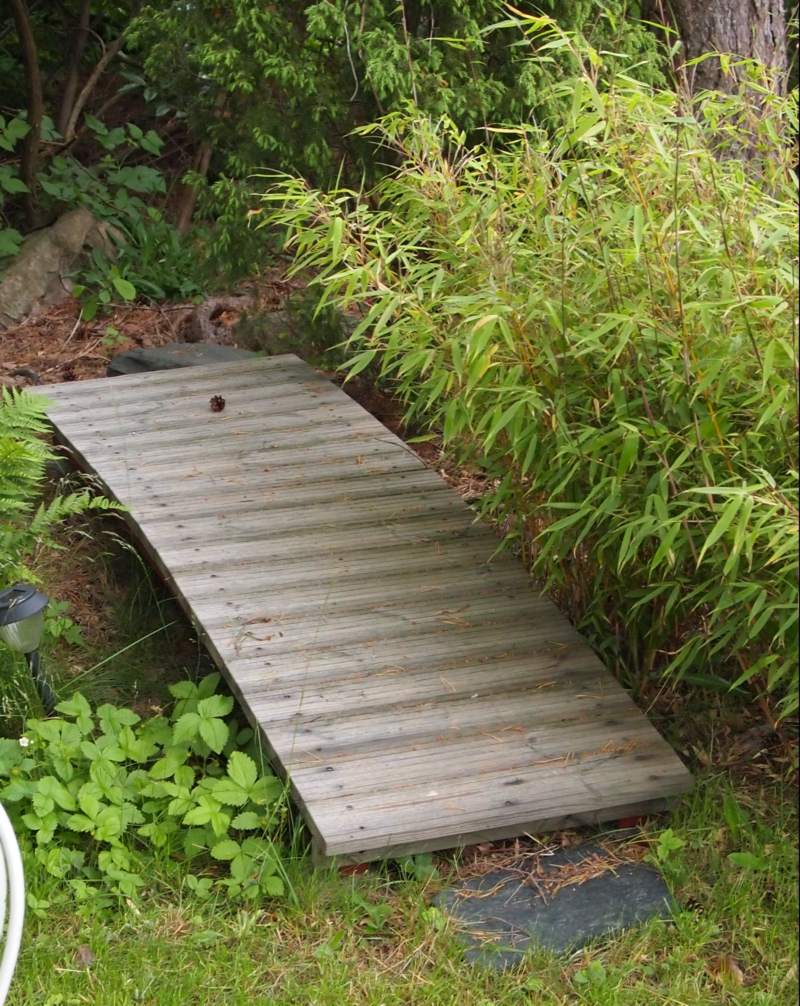
This project did not take much time but turneed out really well. The bridge has now been "in operation" for five years without any problems. Even deer and moose have passed it wothout surprises.
Tools and Materials
I used the following material:
- 25x45 wood strips for the beams, XX m
- 32x95 heat treated planks, xx m
- Wood oil
- Outdoor paint
- Outdoor screws
I used the following tools:
-
Tape measure or folding rule
-
Carpenters angle
-
Ruler
-
Hand Saw
-
Screwdriver/Battery drill with correct tip
-
Clamps
-
Straps
/Peter
|